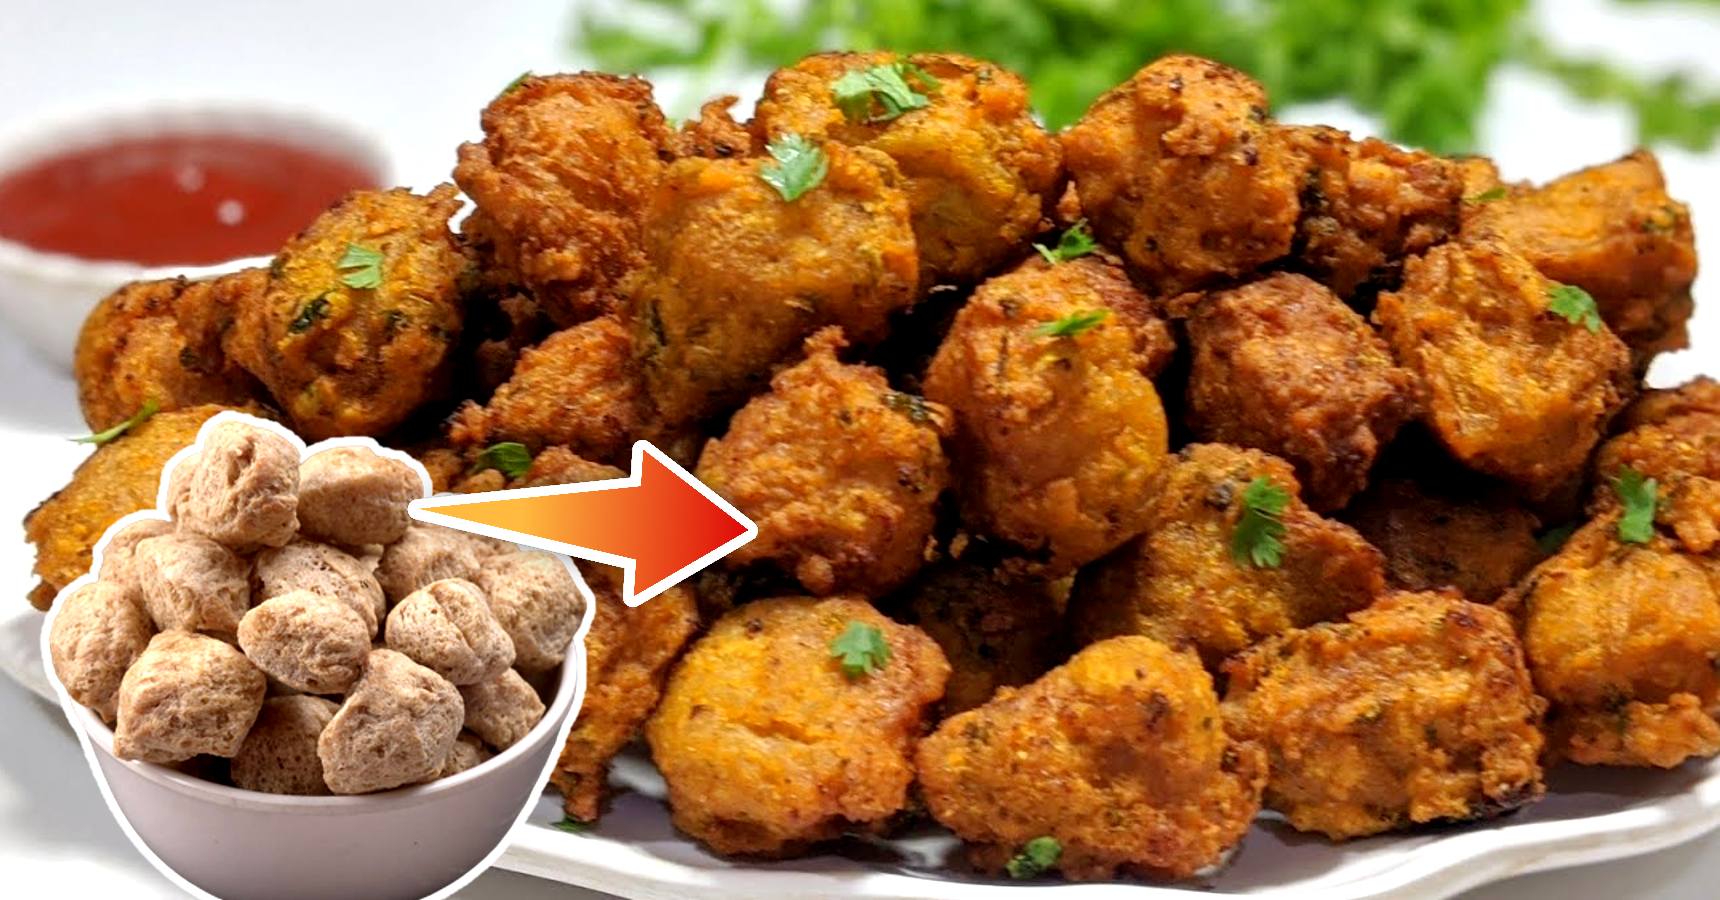
Certainly! Here’s a simple recipe for making Soya Pakoda, a tasty and crunchy snack popular in Indian cuisine:
Ingredients:
- 1 cup soya granules
- 1 large onion, finely chopped
- 2-3 green chilies, finely chopped (adjust to taste)
- 1/4 cup chopped coriander leaves
- 1/2 cup gram flour (besan)
- 2 tablespoons rice flour (optional, for extra crispiness)
- 1 teaspoon ginger-garlic paste
- 1/2 teaspoon turmeric powder
- 1 teaspoon red chili powder (adjust to taste)
- 1 teaspoon garam masala powder
- Salt to taste
- Oil for deep frying
Instructions:
- Prepare the Soya Granules: Boil water in a saucepan. Once the water comes to a rolling boil, turn off the heat and add the soya granules. Let them soak for about 10-15 minutes. Then, drain and squeeze out excess water from the soya granules using your hands. Set aside.
- Prepare the Batter: In a mixing bowl, combine the drained soya granules, chopped onions, green chilies, coriander leaves, ginger-garlic paste, gram flour, rice flour (if using), turmeric powder, red chili powder, garam masala powder, and salt. Mix everything well using your hands. The moisture from the onions will help bind the ingredients together. If needed, sprinkle a little water to make a thick batter.
- Shape the Pakodas: Heat oil for deep frying in a kadai or deep frying pan over medium heat. Take small portions of the batter and shape them into small round balls or flatten them slightly to give them a disc shape. You can use your hands or two spoons for shaping.
- Fry the Pakodas: Once the oil is hot, carefully slide the shaped pakodas into the hot oil. Fry them in batches, making sure not to overcrowd the pan. Fry until they turn golden brown and crisp on all sides, turning occasionally for even cooking. It may take about 4-5 minutes per batch.
- Drain and Serve: Once the pakodas are done, use a slotted spoon to remove them from the oil and place them on a plate lined with paper towels to drain excess oil.
- Serve: Serve the hot and crispy Soya Pakodas with your favorite chutney or sauce.
Enjoy your homemade Soya Pakodas as a delicious snack or appetizer!
बिल्कुल! यहाँ सोया पकोड़ा बनाने की सरल रेसिपी है:
सामग्री:
- 1 कप सोया ग्रैन्यूल्स
- 1 बड़ा प्याज, बारीक कटा हुआ
- 2-3 हरी मिर्च, बारीक कटी हुई (स्वाद के अनुसार समायोजित करें)
- 1/4 कप कटा हुआ धनिया पत्ती
- 1/2 कप बेसन
- 2 बड़े चमचे चावल का आटा (वैकल्पिक, अतिरिक्त क्रिस्पी होने के लिए)
- 1 चमच अदरक-लहसुन का पेस्ट
- 1/2 छोटी चम्मच हल्दी पाउडर
- 1 चम्मच लाल मिर्च पाउडर (स्वाद के अनुसार समायोजित करें)
- 1 चम्मच गरम मसाला पाउडर
- नमक स्वाद के अनुसार
- तलने के लिए तेल
निर्देश:
- सोया ग्रैन्यूल्स को तैयार करें: एक सॉसपैन में पानी उबालें। जब पानी एक उबाल आने लगे, तब आग बंद करें और सोया ग्रैन्यूल्स डालें। उन्हें लगभग 10-15 मिनट के लिए भिगोने दें। फिर, सोया ग्रैन्यूल्स को छान लें और हाथों से अतिरिक्त पानी निचोड़ दें। इसे अलग रखें।
- बैटर तैयार करें: एक मिश्रण कटोरे में, छानी हुई सोया ग्रैन्यूल्स, कटी हुई प्याज, हरी मिर्च, धनिया पत्ती, अदरक-लहसुन का पेस्ट, बेसन, चावल का आटा (यदि उपयोग किया जाए), हल्दी पाउडर, लाल मिर्च पाउडर, गरम मसाला पाउडर, और नमक मिलाएं। हाथों से सब कुछ अच्छी तरह मिलाएं। प्याज से आने वाली नमकीनी बटेर बिन्दुओं को बाँधने में मदद करेगी। यदि आवश्यक हो, थोड़ा पानी डालकर गाढ़ा बैटर बनाएं।
- पकोड़े का आकार दें: मध्यम आंच पर कड़ाही या डीप फ्रायिंग पैन में तेल गरम करें। छोटे हिस्से लेकर उन्हें छोटे गोलाकार या फिर उन्हें थोड़ा सा दबा दें ताकि वे डिस्क की आकृति में हो जाएं। आप हाथ या दो चमचों का इस्तेमाल कर सकते हैं।
- पकोड़े तलें: जब तेल गरम हो जाए, सावधानीपूर्वक बनाए गए पकोड़े को गरम तेल में डालें। सावधानीपूर्वक पकोड़ों को तलें, ध्यान दें कि पैन में अधिक भराव न हो। वे सोने के रंग के होने तक और स्वाद के लिए तेल में बार-बार बदलते रहें। यह लगभग 4-5 मिनट प्रति बैच में हो सकता है।
- निकालें और परोसें: जब पकोड़े तैयार हो जाएं, उन्हें तेल से निकालें और उन्हें ब्लॉटिंग पेपर से लाइन की गई प्लेट पर रखें ताकि अतिरिक्त तेल निकल जाए।
- परोसें: गरमा गरम सोया पकोड़े अपनी पसंदीदा चटनी या सॉस के साथ परोसें।
अपने घर पर बनाए गए सोया पकोड़े का आनंद लें, यह एक स्वादिष्ट नाश्ता या स्टार्टर है!


